Lesson 6: Computed Fields, Table Component, and Offline Detection
🏳️ Haven't completed the previous lesson?
No worries! You can pickup from here:
git checkout tags/lesson-6
In this lesson, we will build a review page that fetches trip and catch data from RADFish stores, aggregates catch statistics by species, and displays the results using the RADFish Table component. We'll also implement offline detection using the useOfflineStatus hook to provide dynamic UI feedback based on network connectivity.
Step 1: Access RADFish stores and fetch trip/catch data
We need to fetch the trip and catch data from their respective RADFish stores to display on the review page. This data loading happens inside a useEffect hook, which is React's way of performing side effects like data fetching when a component mounts or when certain values change.
1.1: Import Required Utilities and Constants
Before we can access RADFish collections and format our data, we need to import the necessary utilities and constants.
Open src/pages/ReviewSubmit.jsx and add these imports to your existing import statements:
import { useApplication } from "@nmfs-radfish/react-radfish";
import { Button } from "@trussworks/react-uswds";
import Layout from "../components/Layout";
import {
  formatDate,
  format24HourTo12Hour,
  aggregateCatchesBySpecies,
  STORE_NAMES,
  COLLECTION_NAMES,
} from "../utils";
1.2: Understanding useEffect for Data Loading
The data fetching code is wrapped inside a useEffect hook that runs when the component first loads:
useEffect(() => {
  const loadTripData = async () => {
    setLoading(true);
    setError(null); // Reset error state on new load attempt

    // Guard clause: Ensure app and tripId are available before proceeding
    if (!app || !tripId) {
      console.warn(
        "App or Trip ID not available in state, cannot load review data.",
      );
      navigate("/"); // Redirect home if essential data is missing
      return;
    }

    try {
      // Access RADFish collections
      const tripStore = app.stores[STORE_NAMES.TRIP_STORE];
      const tripCollection = tripStore.getCollection(COLLECTION_NAMES.TRIP_COLLECTION);
      const catchCollection = tripStore.getCollection(COLLECTION_NAMES.CATCH_COLLECTION);

      // Fetch the trip details
      const tripsDataFromCollection = await tripCollection.find({ id: tripId });

      // Handle trip not found
      if (tripsDataFromCollection.length === 0) {
        setError(`Trip with ID ${tripId} not found`);
        navigate("/"); // Redirect home if trip doesn't exist
        return;
      }

      const selectedTrip = tripsDataFromCollection[0];
      setTrip(selectedTrip); // Store fetched trip data in state
      // Fetch all catches associated with this trip
      const tripCatches = await catchCollection.find({ tripId: selectedTrip.id });

      // Store catches for API submission
      setCatches(tripCatches);

      // Process and store the aggregated data...
    } catch (err) {
      console.error("Error loading trip data:", err);
      setError("Failed to load trip data");
      navigate("/"); // Redirect home on critical error
    } finally {
      setLoading(false);
    }
  };

  loadTripData();
}, [app, tripId, navigate]); // Dependencies for the effect
Understanding useEffect and Data Loading:
-
useEffect Hook: The
useEffecthook lets you perform side effects in functional components. It runs after the component renders and can be configured to run only when specific values change. -
Dependency Array: The
[app, tripId, navigate]array tells React to re-run this effect only whenapp,tripId, ornavigatechange. This prevents unnecessary re-fetching of data. -
Async Function Pattern: Since
useEffectcannot be async directly, we define an async function (loadTripData) inside it and call it immediately. -
State Management: The effect manages multiple pieces of state:
setLoading(true)- Shows loading indicator while fetchingsetError(null)- Clears any previous errorssetTrip(selectedTrip)- Stores the fetched trip datasetCatches(tripCatches)- Stores raw catch data for API submissionsetLoading(false)- Hides loading indicator when done
Learn More:
- React useEffect Documentation - Comprehensive guide to using useEffect for side effects
- Synchronizing with Effects - Learn when and how to use Effects in React
1.3: RADFish Data Access Pattern
The highlighted code demonstrates the core data access pattern in RADFish applications:
- Store Access:
app.stores[STORE_NAMES.TRIP_STORE]gets the RADFish store using constants for better maintainability - Collection References: We obtain references to both the trip data and catch collections using
COLLECTION_NAMESconstants - Trip Lookup:
Form.find({ id: tripId })searches for the specific trip using the ID passed from the previous page - Error Handling: If no trip is found, we set an error message and redirect to prevent displaying invalid data
- Data Storage: The found trip is stored in React state (
setTrip) for use throughout the component - Related Data:
Catch.find({ tripId: selectedTrip.id })fetches all catch records that belong to this trip
Step 2: Call the aggregation function
After fetching the raw catch data, we need to process it to calculate summary statistics for display. This involves grouping catches by species and calculating totals and averages.
        const selectedTrip = tripsDataFromCollection[0];
        setTrip(selectedTrip); // Store fetched trip data in state

        // Fetch all catches associated with this trip
        const tripCatches = await Catch.find({ tripId: selectedTrip.id });

        // Store catches for API submission
        setCatches(tripCatches);

        const aggregatedData = aggregateCatchesBySpecies(tripCatches);
        setAggregatedCatches(aggregatedData);

      } catch (err) {
        // Handle errors during data fetching
        console.error("Error loading trip data:", err);
        setError("Failed to load trip data");
Understanding the Data Aggregation Process:
- Function Call:
aggregateCatchesBySpecies(tripCatches)processes the array of individual catch records - Data Grouping: The helper function groups catches by species (e.g., all "Bass" catches together)
- Statistical Calculations: For each species, it calculates:
- Total Count: How many fish of this species were caught
- Total Weight: Combined weight of all fish of this species
- Average Length: Mean length across all fish of this species
- State Update:
setAggregatedCatches(aggregatedData)stores the processed data in React state
This aggregation transforms individual catch records like:
Bluefin:  2 lbs,  12 in
Bluefin:  3 lbs,  14 in
Salmon:   1 lb,   8 in
Salmon:   2 lbs,  10 in
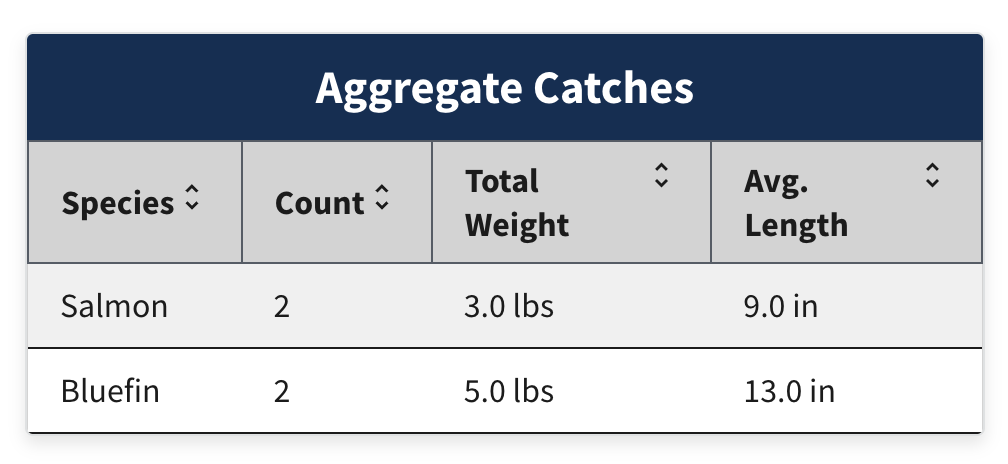
Into summary data like:
Bluefin:  Count=2, Total Weight=5 lbs, Avg Length=13 in
Salmon:   Count=2, Total Weight=3 lbs, Avg Length=9 in
Step 3: Import the RADFish Table Component
Before we can display the aggregated data, we need to import the Table component from RADFish. This is a specialized component designed for displaying tabular data with built-in sorting and styling.
Open src/pages/ReviewSubmit.jsx and update your RADFish imports to include the Table component:
import {
  useApplication,
  Table,
} from "@nmfs-radfish/react-radfish";
About the RADFish Table Component:
The Table component is part of the RADFish library and provides:
- Built-in sorting functionality
- Consistent styling with USWDS design system
- Responsive design for mobile devices
- Accessibility features for screen readers
To learn more about the Table component, see the RADFish Table documentation.
Step 4: Use the RADFish Table component to display aggregated data
Now that we have imported the Table component, we can use it to display the aggregated catch data in a structured and user-friendly way.
<div className="padding-0">
  {aggregatedCatches.length > 0 ? (
    <></>
    <Table
      // Map aggregated data to the format expected by the Table component
      data={aggregatedCatches.map((item, index) => ({
        id: index, // Use index as ID for the table row
        species: item.species,
        count: item.count,
        totalWeight: `${item.totalWeight} lbs`, // Add units
        avgLength: `${item.avgLength} in`, // Add units
      }))}
      // Define table columns: key corresponds to data keys, label is header text
      columns={[
        { key: "species", label: "Species", sortable: true },
        { key: "count", label: "Count", sortable: true },
        { key: "totalWeight", label: "Total Weight", sortable: true },
        { key: "avgLength", label: "Avg. Length", sortable: true },
      ]}
      // Enable striped rows for better readability
      striped
    />
Understanding the RADFish Table Component:
The highlighted code demonstrates how to use the RADFish Table component for displaying structured data:
-
Data Transformation: The
dataprop maps overaggregatedCatchesto format it for table display:- Row IDs: Each row gets a unique
id(using array index) - Unit Labels: Weight and length values get proper units (
lbs,in) - Clean Formatting: Data is structured to match the table's expected format
- Row IDs: Each row gets a unique
-
Column Configuration: The
columnsprop defines the table structure:- Key Mapping: Each column's
keymatches a property in the data objects - Header Labels:
labelsets the user-friendly column header text - Sorting:
sortable: trueenables click-to-sort functionality for each column
- Key Mapping: Each column's
-
Visual Enhancement:
stripedprop adds alternating row colors for easier reading
This creates a professional, sortable data table that users can interact with to review their trip's catch summary.
Step 4: Testing Offline Functionality
Now let's test how the application automatically adapts to network changes using RADFish's offline detection capabilities.
4.1: Understanding Offline Detection
The Review page uses RADFish's useOfflineStatus hook to detect network changes and adapt the UI accordingly.
import {
  useApplication,
  Table,
  useOfflineStatus,
} from "@nmfs-radfish/react-radfish";
import {
  Button,
} from "@trussworks/react-uswds";
import { Layout } from "../components/Layout";

function ReviewSubmit() {
  const navigate = useNavigate();
  const location = useLocation();
  const app = useApplication();
  const { isOffline } = useOfflineStatus();
Footer Button Display Logic:
const getFooterProps = () => {
  // Default props
  const defaultProps = {
    showBackButton: true,
    showNextButton: true,
    backPath: "/",
    backNavState: {},
    nextLabel: "Submit",
    onNextClick: handleSubmit,
    nextButtonProps: {},
  };

  if (!trip) {
    // If trip data hasn't loaded, hide buttons
    return { ...defaultProps, showBackButton: false, showNextButton: false };
  }

  // Customize based on trip status
  if (trip.status === "submitted") {
    // If already submitted, only show Back button navigating to Home
    return {
      ...defaultProps,
      backPath: "/",
      showNextButton: false,
    };
  } else {
    defaultProps.backPath = `/end`; // Back goes to EndTrip page
    defaultProps.backNavState = { state: { tripId: tripId } }; // Pass tripId back

    if (isOffline) {
      defaultProps.nextLabel = "Save";
    } else {
      defaultProps.nextLabel = "Submit";
      defaultProps.nextButtonProps = { className: "bg-green hover:bg-green" };
    }

    return defaultProps;
  }
};
Submission Logic:
const handleSubmit = async () => {
  if (!trip) return;

  const tripStore = app.stores[STORE_NAMES.TRIP_STORE];
  const tripCollection = tripStore.getCollection(COLLECTION_NAMES.TRIP_COLLECTION);

  try {
    const finalStatus = isOffline ? "Not Submitted" : "submitted";

    await tripCollection.update({
      id: trip.id,
      status: finalStatus,
      step: 4,
    });

    navigate(isOffline ? "/offline-confirm" : "/online-confirm");

  } catch (error) {
    console.error("Error submitting trip:", error);
    setError("Failed to submit trip. Please try again.");
  }
};
Summary:
- Online: Green "Submit" button →
status: "submitted"→/online-confirm - Offline: Blue "Save" button →
status: "Not Submitted"→/offline-confirm - Pre-built Pages: Both confirmation pages (
/online-confirmand/offline-confirm) are already created for you. The app automatically navigates to the appropriate one based on your connection status
4.2: Test Development Mode
- Start the development server:
npm run start - Navigate to the Review page after completing a trip
- Open Developer Tools (F12) → Network tab
- Toggle between "No throttling" and "Offline" in the network dropdown
- Observe the button changes:
- Online: Green "Submit" button

- Offline: Blue "Save" button
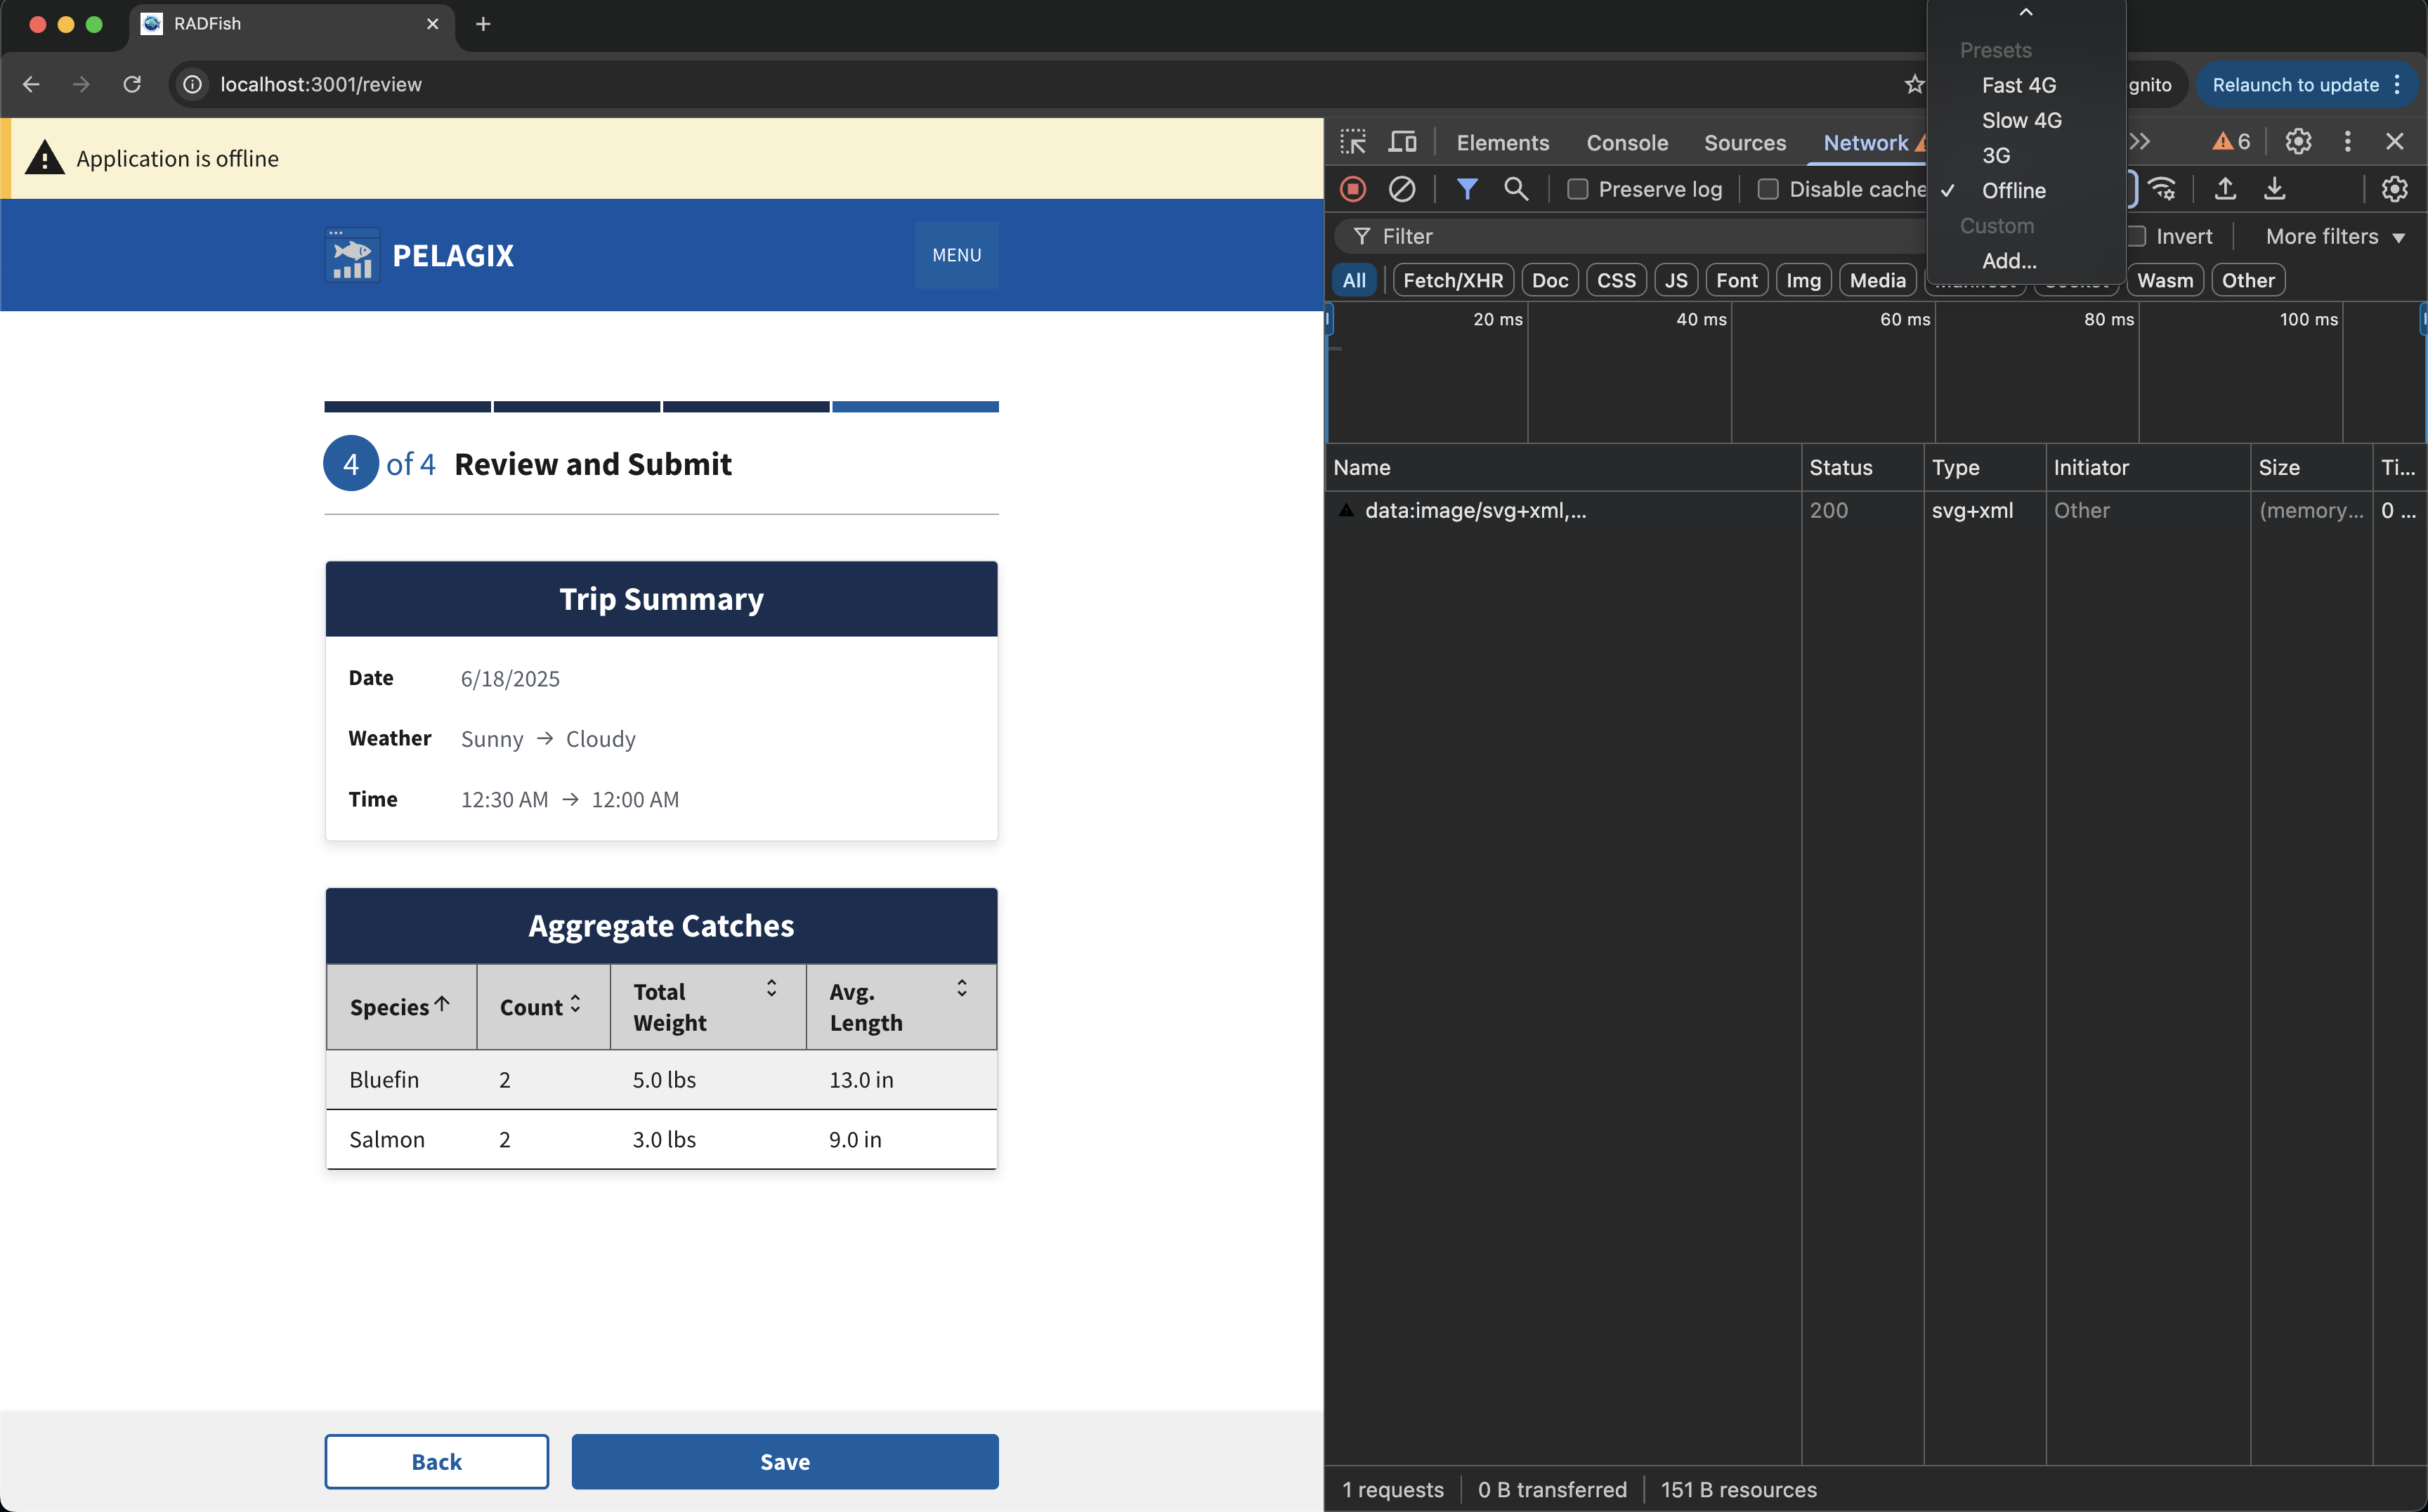
- Online: Green "Submit" button
4.3: Test Production Mode
-
Build the application:
npm run build -
Serve the production build:
npm run serve -
Test offline functionality:
- Complete a trip and navigate to Review page
- Toggle offline/online in dev tools
- Reload the page while offline - it should still work
- Submit a trip while offline - it saves locally as "Not Submitted"
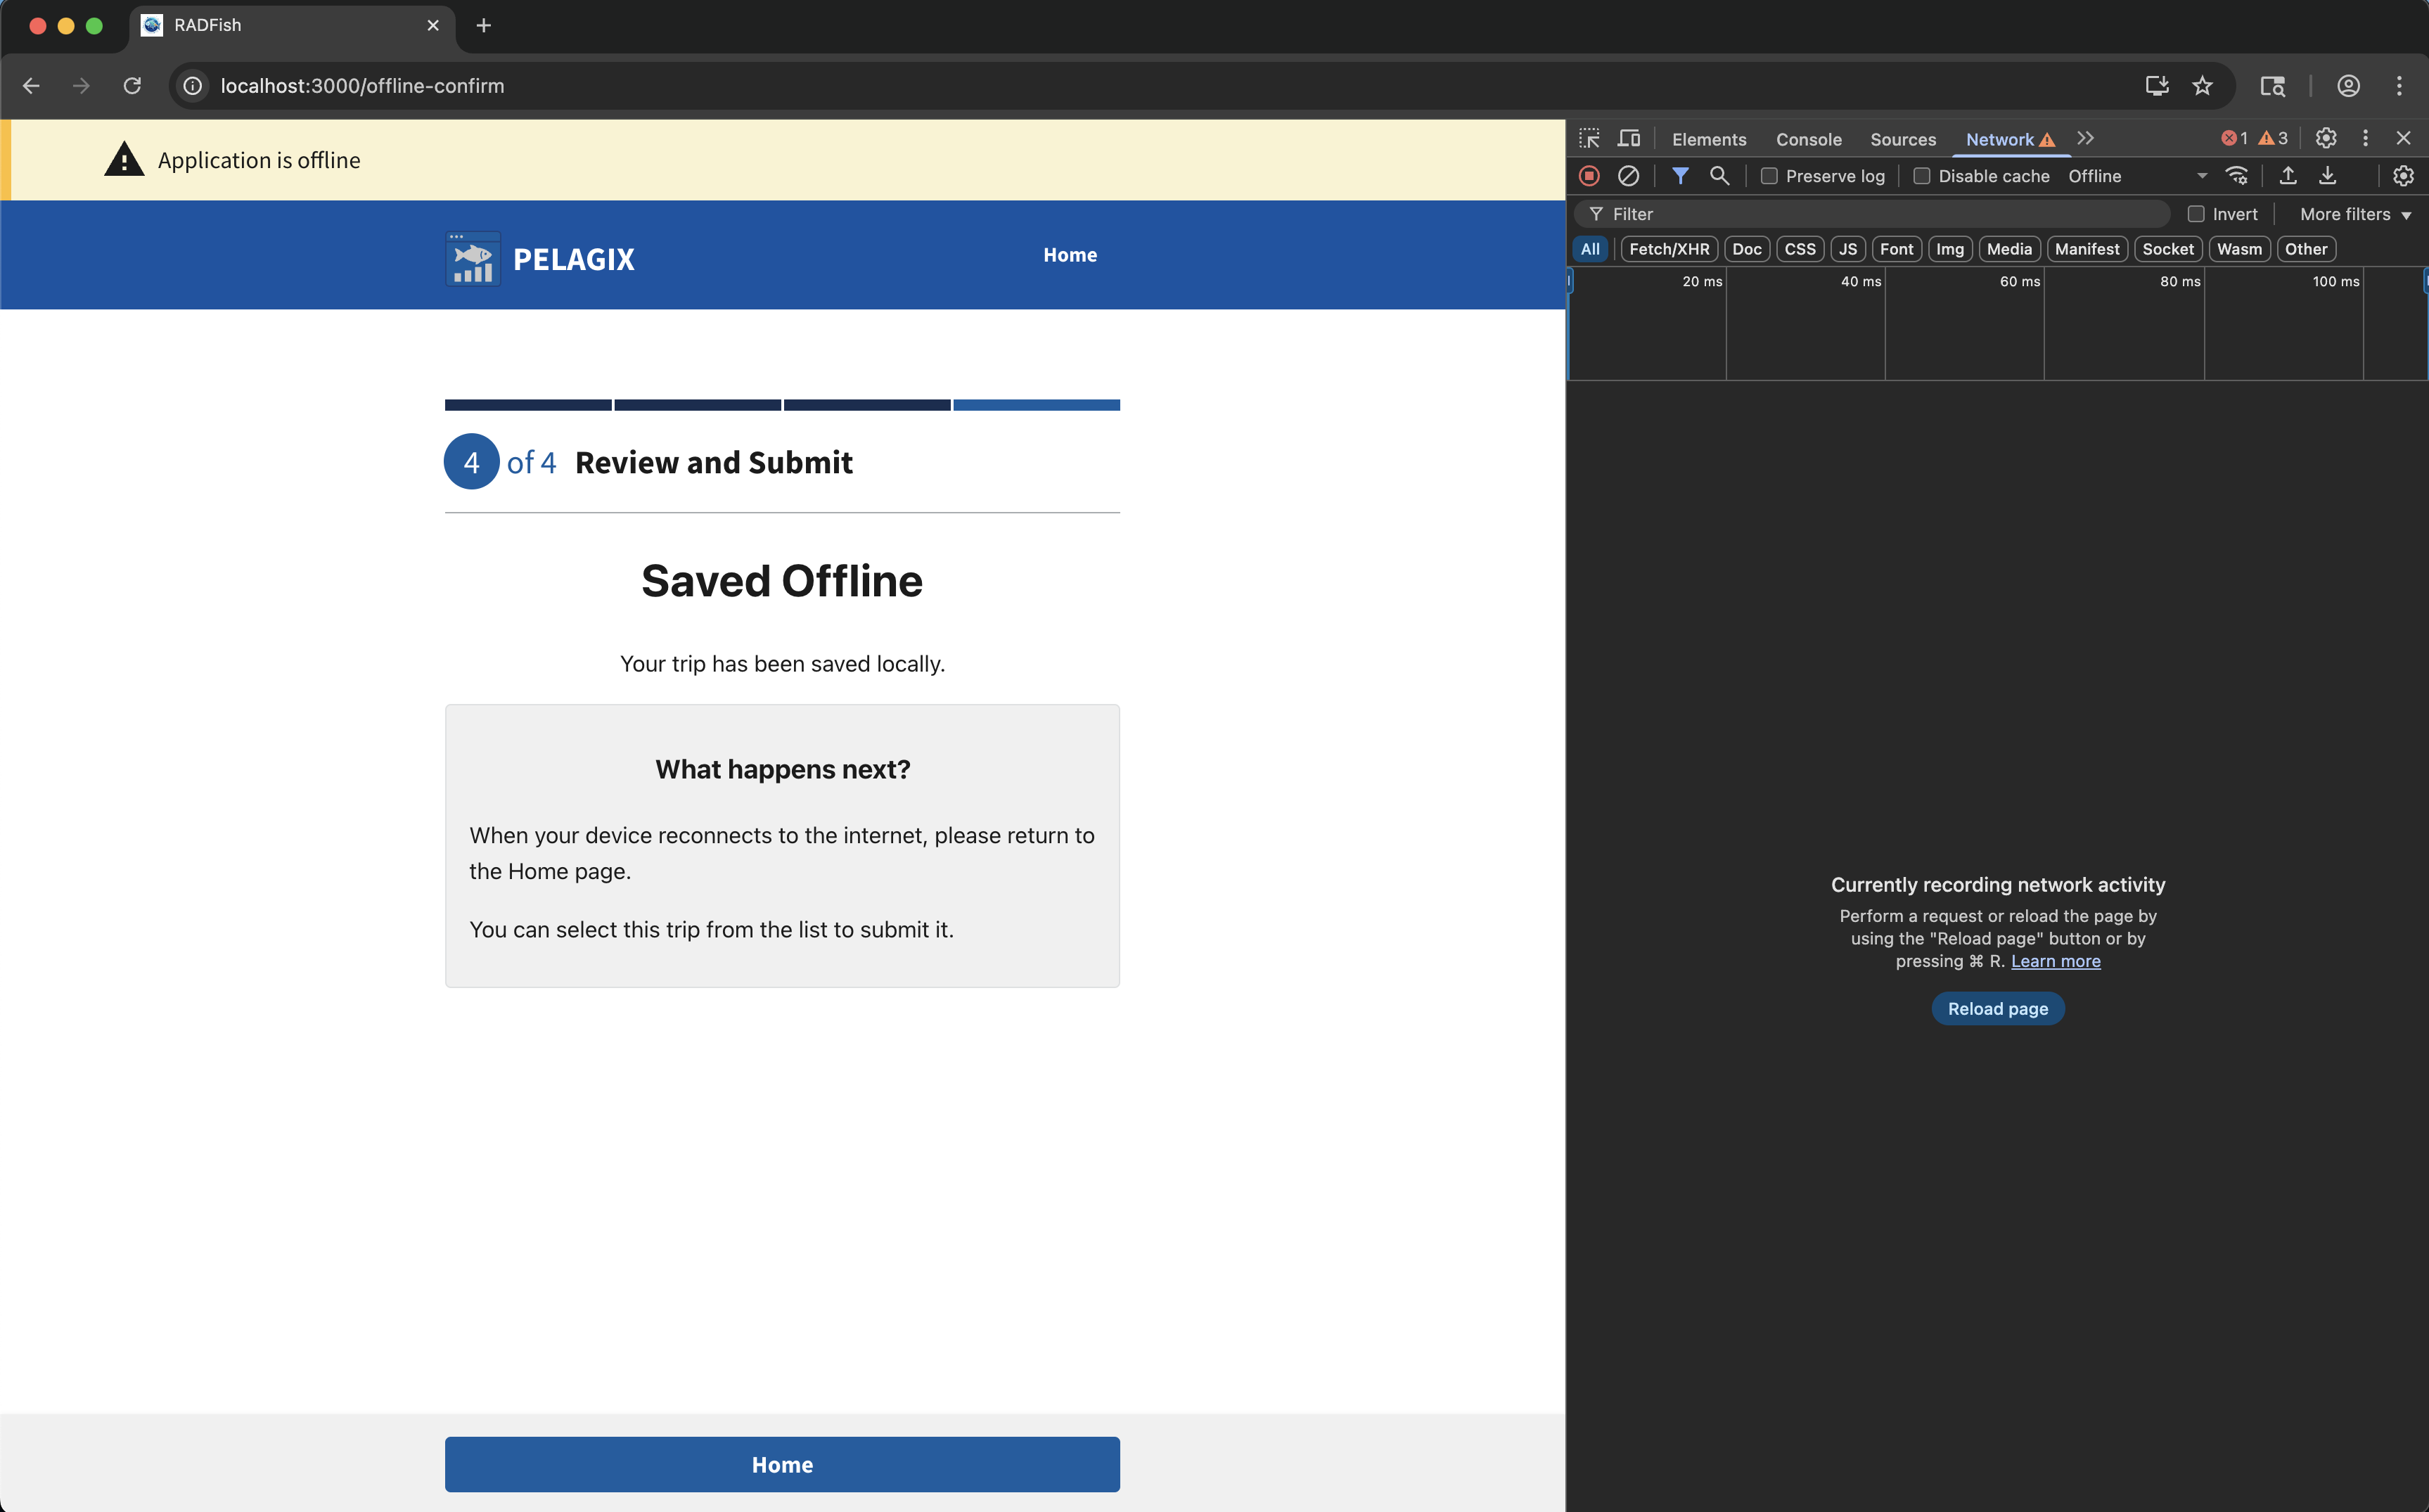
- Click the Save button to submit the trip while offline
- You should see the offline confirmation page:
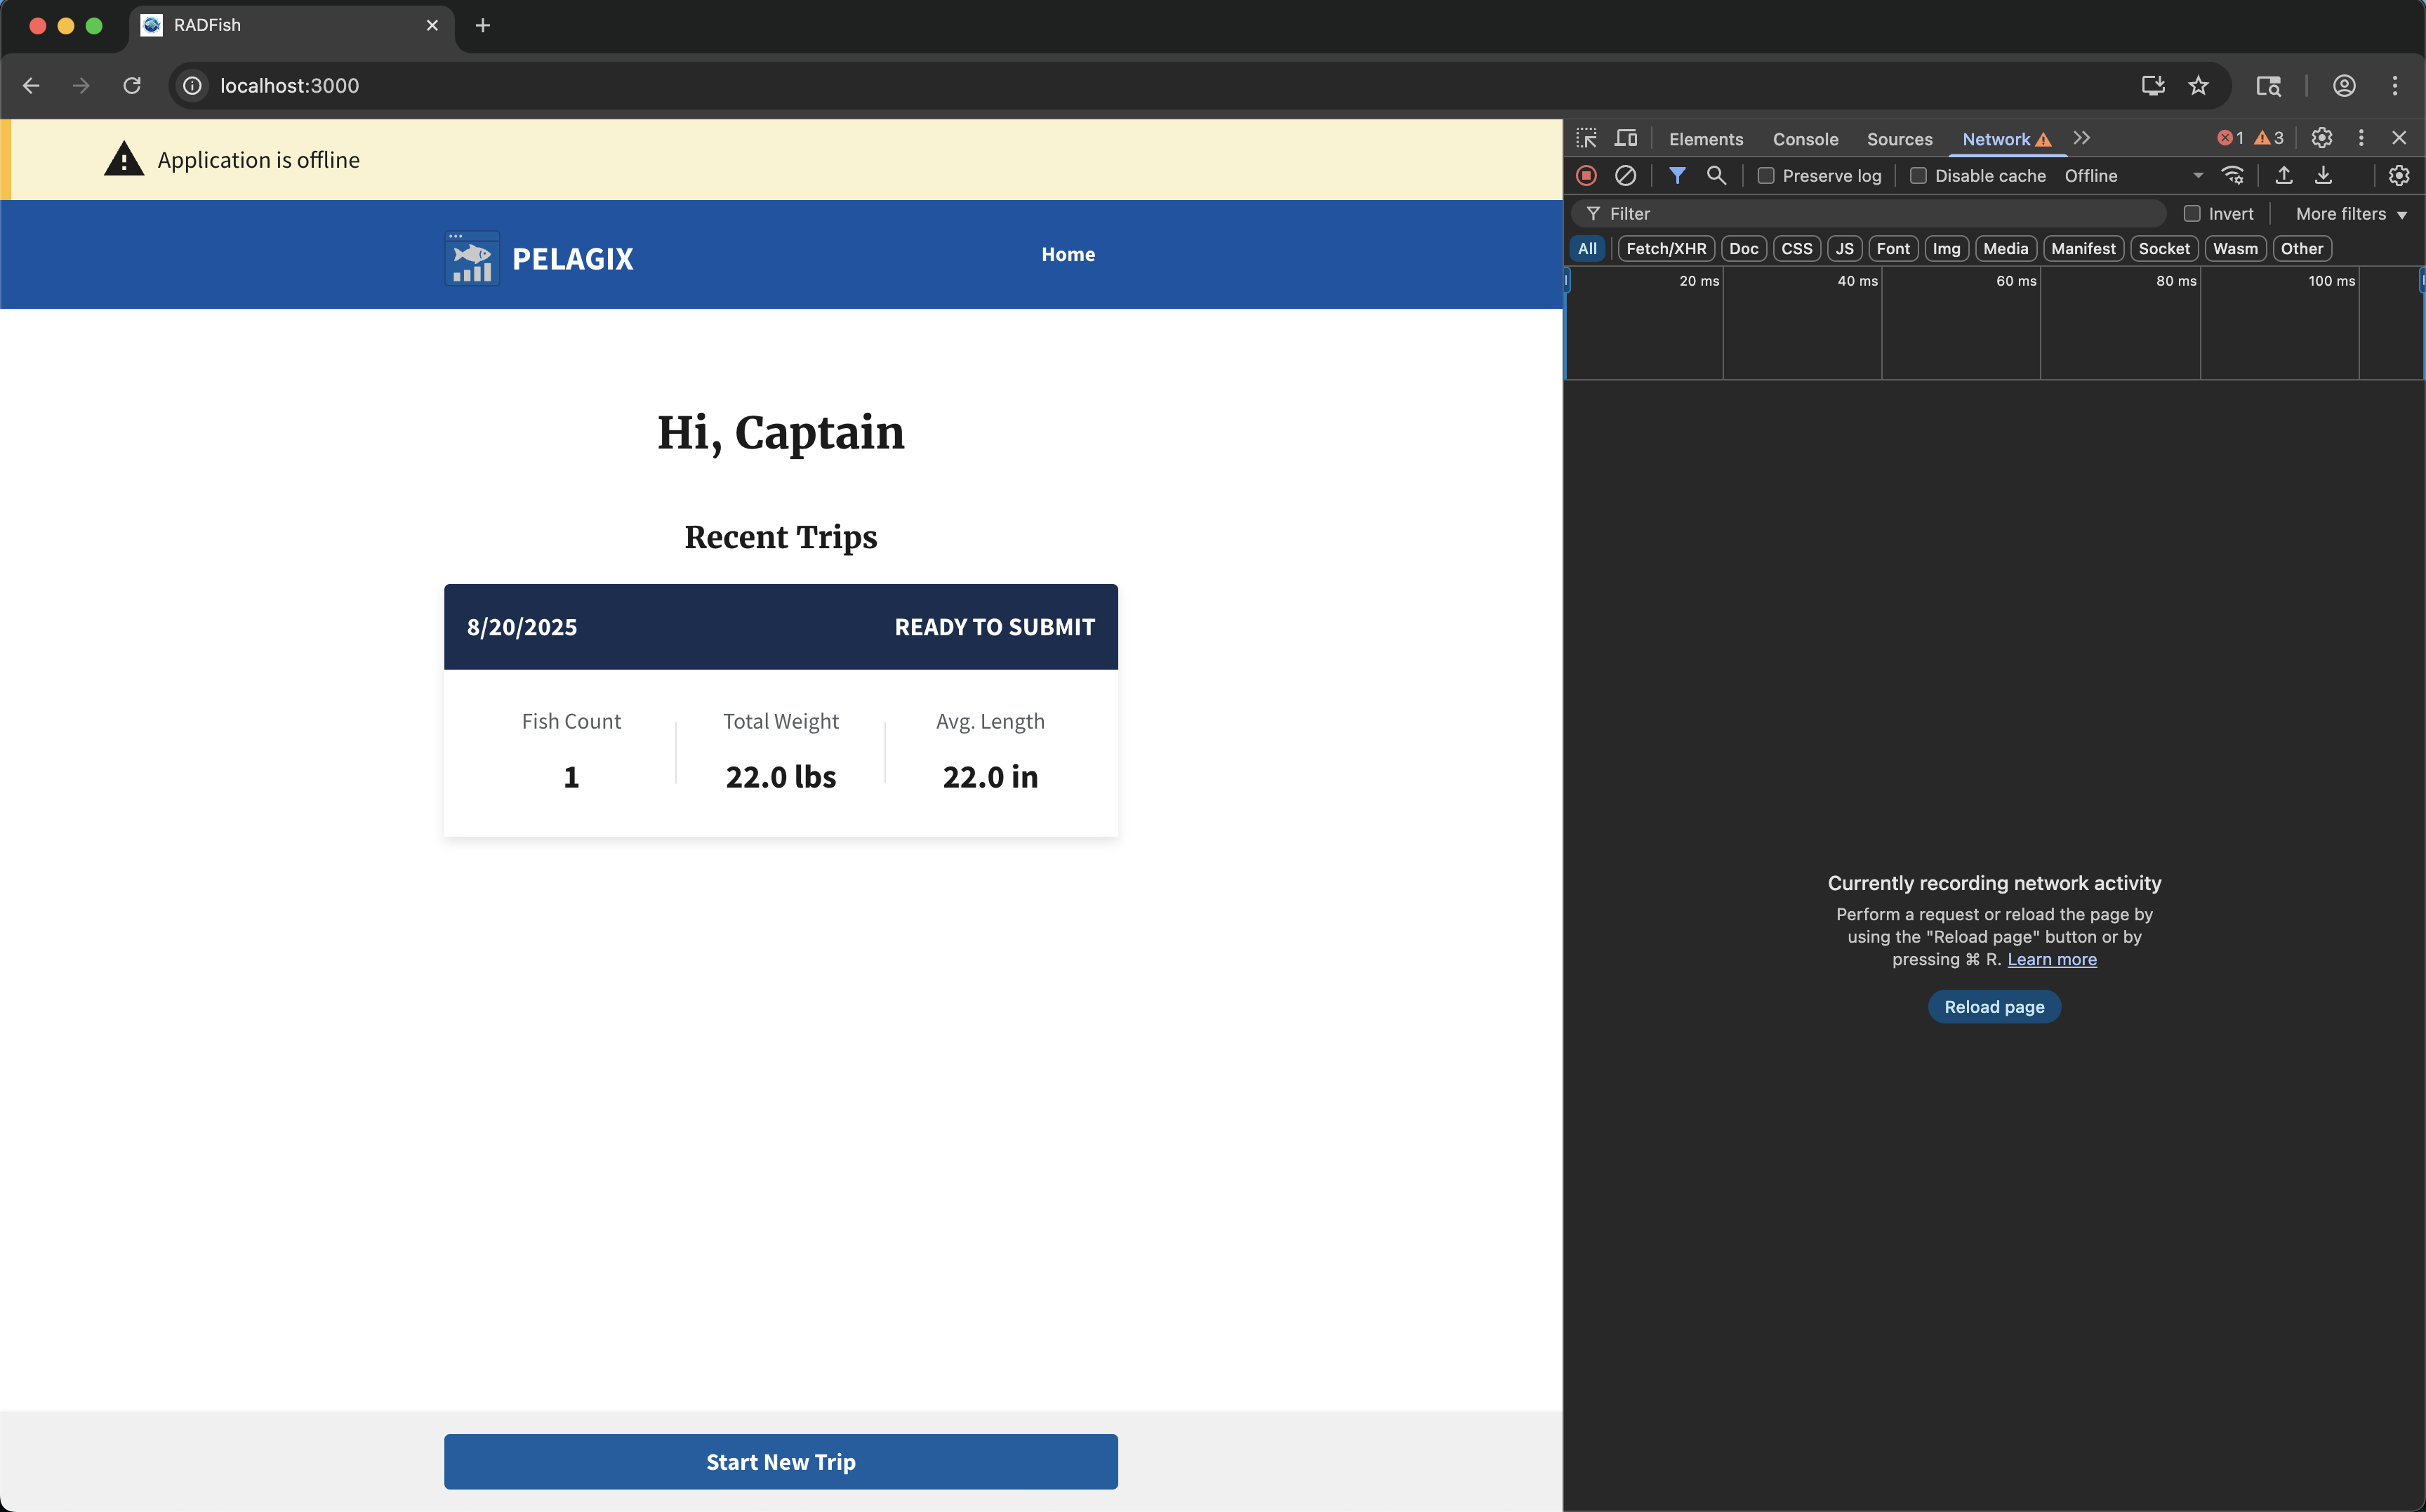
- Click the Home button to return to the homepage
- You should now see your trip with status "READY TO SUBMIT":
If you encounter unexpected behavior during offline testing, consider clearing your browser's site data. To delete all records:
- Navigate to IndexedDB →
learn-radfish - Click on the "Delete database" button (Chrome) or "Clear all data" button (Firefox)
Conclusion
In this lesson, you learned how to fetch data from multiple RADFish stores, perform data aggregation, and display the results using the RADFish Table component. You also implemented offline detection using the useOfflineStatus hook.
Key Accomplishments:
- Data Integration: Fetched and aggregated trip and catch data from multiple RADFish stores
- Table Display: Used the RADFish Table component to present aggregated catch data
- Offline Detection: Implemented dynamic UI changes based on network status using
useOfflineStatus - Production Testing: Tested offline functionality in both development and production builds
Your RADFish application now provides a complete offline-capable experience with clear visual feedback for users.